By Justin Gerard

In the last post, I focused on the traditional aspects of my process for watercolor and digital. This week, we focus on digital hocus pocus used to complete these pieces.
My digital process is mainly derived from the Dutch-Flemish indirect manner of working.
If I travelled back in time and gave the Dutch-Flemish painters an Imac with Adobe Photoshop CS5 on it and a Intuos 4, they might have promptly thrown it all in the lake and then painted an unflattering picture of me as a fruit basket. But then again, they might decide that their methods work well regardless of what medium they are executed in and they would go on to make some awesome work with the new tools.
The process I follow mainly involves first laying in the shadows transparently, and then working in the highlights opaquely on top of them. This is then followed by adjusting the colors and details.
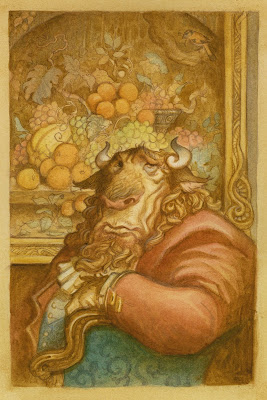
I have an ancient Epson flatbed scanner, one that primitive man invented sometime after fire, but before the wheel. Like most stone-age equipment, it is quite reliable, but it does tend to get its colors off just slightly. The image always seems lifeless and dead to me after it has been scanned.
This first stage is just to get the image back to what it looks like to the naked eye in soft light.
I work purely in multiply layers to establish the dark areas and shadow details. I work this up to slowly to kind of explore the nuances of the lighting in the image. This chance to explore the lighting is one of my favorite aspects of working digitally.
I use multiply (set to zero black) to add the color. You can use any of the other modes to achieve color, (color, soft light, hard light etc.) I just prefer multiply because it behaves a little more predictably and because it tends to look a little more natural over a traditionally painted image.
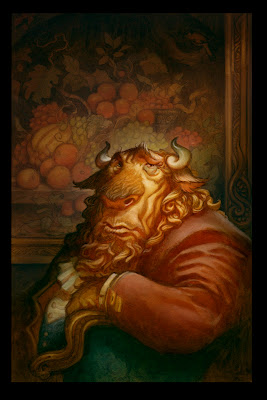
After working up the shadows to a satisfactory level of darkness, I work highlights in to slowly refine the shapes and give them more dimension. As in the Dutch-Flemish manner, I tend to work opaquely at this point, and generally stick to the areas that are being lit.

Color Adjustments & Final Details
For the final details I work with normal layers to sharpen up details and focal points. I try not to overwork the whole image at this point though. This is both a blessing and a curse with digital. Since you can essentially zoom in forever, you could feasibly spend the rest of your existence refining every little hair. At some point you need to make decisions about what needs to be refined and what can be left a little vague.
You have read this articleJustin Gerard
with the title Illustration Process: Digital Trickery. You can bookmark this page URL https://teamcolors.blogspot.com/2011/03/illustration-process-digital-trickery.html. Thanks!
Write by:
RC - Tuesday, March 8, 2011


Comments "Illustration Process: Digital Trickery"
Post a Comment